The usual way to set up remote access to our CCTV software SecuritySpy running on your Mac is via port forwarding (see Installation Manual – Remote Access). This method allows direct incoming connections to SecuritySpy from the Internet, and is achieved by configuring your router (which SecuritySpy can do automatically for most routers). This method is great for most users, as it usually allows high-performance remote access with minimal configuration.
However, some users may want to consider other methods for the following reasons:
- Port forwarding only works when your ISP gives you a true public IP address, which is not always the case, especially with cellular or satellite internet connections (e.g. 4G, 5G, Starlink).
- If you have two routers between the Mac and the Internet (e.g. your ISP router plus your own router), port forwarding configuration is difficult – the usual solution is to switch one of these routers to bridge/passthrough mode, but this isn’t always possible.
- ISP routers sometimes prevent users from setting port forwarding rules.
- Institutions with very strict network policies may have a blanket ban on allowing any kind of incoming connections from the Internet.
If you can’t use port forwarding for any reason, the solution is to set up a Virtual Network or a Tunnel (sometimes called a proxy) via a third-party service in order to access your system. A number of these solutions are described below, with setup instructions.
A Virtual Network, as opposed to a physical network, is a Software-Defined Networking (SDN) solution that creates an overlay network on top of existing network infrastructure, spanning across multiple physical networks and the Internet. Members of this virtual network can communicate with each other as if they were on the same physical network.
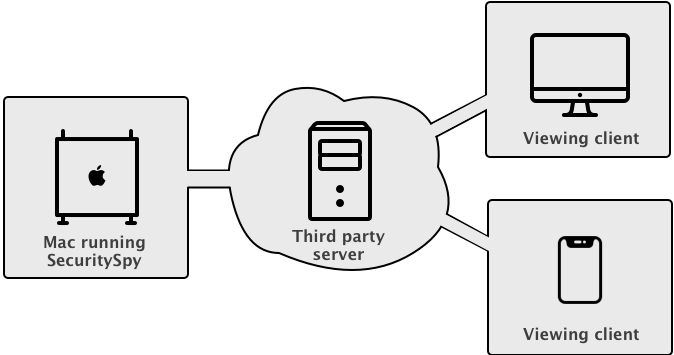
With a Tunnel solution, the data is relayed via a third-party server acting as an intermediary. Note that many providers apply data transfer limits, so you should take steps to moderate your bandwidth usage when accessing remotely, such as minimising live video streaming, avoiding large file downloads, and generally using the connection sparingly.
Which solution you choose generally comes down to the following question: do you have a fixed set of devices from which you want to access your SecuritySpy server? For most users, the answer to this question is yes, and in this case a Virtual Network is the best solution. On the other hand, if you want your SecuritySpy server open to the Internet for anyone to (attempt to) access, then a Tunnel solution provides this.
In terms of security, both solutions offer encrypted Internet communication, however the Virtual Network solution is considered more secure because clients have to first be a member of the network in order to even attempt connections to the server, which adds an extra layer of security. Note that in either case, the connection to SecuritySpy itself is via its plaintext HTTP web interface (not the secure HTTPS interface), so this must be enabled in SecuritySpy’s web settings. This is because the encryption is handled by the virtual network / tunnel solution itself, not by SecuritySpy.
Virtual Network (SDN) Solutions
Client software is installed on all devices, allowing them to communicate freely with each other as if they were on the same physical network. The system assigns each device a virtual IP address. Devices are only accessible to others within this virtual network, not from outside. The central server primarily helps set up direct connections between devices, rather than relaying data itself.
Continue reading →
 Continue reading
 This is a basic, inexpensive outdoor camera with 4 MP resolution, good low-light performance, IR night-vision, and a compact form factor. It has a fixed 2.8mm lens, which produces a wide-angled view covering 102° horizontally. At only $100, this camera is great value and can make an effective addition to any CCTV system.