A frequent request we receive from our users is for a quick and easy overview of what is required to set up a home video security system. Our SecuritySpy Installation Manual is a great place to start, as it provides information on all the topics involved, however for many users the selection of available IP cameras can be bewildering, and the setup can be daunting. Therefore, we have created this guide to provide clear and easy-to-follow advice that can be used by anyone – technical or not – to create a highly effective video surveillance system for their home.
What you will need:
- A Mac, such as a Mac mini or iMac.
- An ethernet switch or router
- Ethernet cables (if using wired setup)
- SecuritySpy – our Mac software that lies at the heart of your CCTV system, recording video and triggering events upon motion detection.
- 4 IP cameras.
Cost:
- If you already have a Mac: approximately $700
- If you need to buy a Mac mini: approximately $1300
1. The Mac
Most users already have a Mac in use at their home, and if you just need a few cameras you can simply run SecuritySpy on your existing Mac without significantly affecting its performance. For this purpose a Mac mini, iMac or Mac Pro is perfect (you can also use a MacBook, however due to the fact that recording will only take place when the Mac is awake and at home, a laptop is less suitable than a desktop for this purpose).
For more than 4 cameras or so (at 1 MP resolution each), the processing power becomes significant and you will probably want to use a dedicated Mac for your home video security system. For this purpose a Mac mini is perfect: small, inexpensive and powerful, a basic dual-core Mac mini is capable of recording up to 8 cameras (the previous-generation quad-core models are about twice as powerful, so consider obtaining one second hand if you need between 8 and 16 cameras).
2. The Network
Your Mac will be connecting to the cameras over a wired (ethernet) or wireless (WiFi) network. Wired ethernet offers much greater reliability and performance than WiFi, so we recommend using it wherever possible. If this is not possible, then WiFi will provide an adequate solution provided that the devices aren’t too far from the wireless access point.
If connecting the cameras using ethernet, use a high-quality switch (for example a Netgear GS105 or GS108), and connect the Mac, cameras and internet router all to this switch using ethernet cables.
3. The Cameras
Go for trusty manufacturers such as Axis, Canon, Samsung and Vivotek. If you are confident with network setup, also consider Dahua Technology or Hikvision. Beyond our 10 Recommended IP Cameras 2015 blog post, here are a few suggestions for network cameras that are easy to set up and will work well in a home setting:
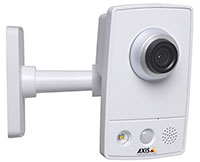
Axis M1034-W or M1054: these compact low-cost cameras sport good features sets, including night-vision, audio, and a 1 MP resolution. The M1034-W has WiFi capabilities while the M1054 is wired only.

Samsung SNH-P6410BN: this is a small low-cost camera with high image quality and a great feature set including WiFi, night-vision, audio, and a maximum resolution of 2.1 MP. [UPDATE MARCH 2016: Samsung’s latest firmware update removes web server access to the camera, making it much more difficult to set up and use the camera with third party software such as SecuritySpy, therefore we don’t recommend our users purchase this camera. Good alternatives are the Hikvision DS-2CD2412F-IW, the Zavio F3115 or the Vivotek FD8168.]
4. Setup
Firstly, connect a camera to the switch using an ethernet cable, and connect its camera’s power supply.
Samsung cameras only: there is a short registration procedure via the Samsung SmartCam web portal, via which you choose a password for the camera. Make sure that this password is not more than 8 characters long.
Axis cameras only: use our Network Device Finder app to find the camera on your network, then double-click the entry in the Network Device Finder window to open the camera in a web browser, where you will be asked to set a password.
Wireless cameras only: as in the above step, find the camera via Network Device Finder and open it in a web browser. Locate the WiFi settings, and set these up according to your home WiFi network by specifying the network name (SSID) and password (for Axis cameras, click Setup, then System Options, then Network, then Wireless; for Samsung cameras click Setup, then Network Setting, then Wireless Network).
Finally, in SecuritySpy:
- Open the Video Device Settings window.
- Click the Bonjour menu, which is the small menu next to the Address box, and select the camera from this menu.
- Enter the username and password you specified above (the default username is admin for Samsung cameras and root for Axis cameras)
- Select H.264 RTSP as the Format:
 5. Setting up SecuritySpy

You can download and purchase SecuritySpy via our web site and online store. And, if you haven’t already done so, it’s a good idea to read the Getting Started section of the SecuritySpy User Manual to get quick overview of how to use SecuritySpy.
To get you up and running, here are some good basic settings, which you set in the Camera Settings window:
- Under the Setup tab, enter a descriptive name for the camera, for example “Front door”.
- Under the Audio tab, choose whether you want to record audio (it’s on by default).
- Under the Motion capture tab, enable the Capture movie when motion is detected option.
Once you are done configuring the cameras, click OK, then go to the Control menu and select Set all cameras to Active mode. In Active mode, SecuritySpy will record whenever motion is detected in any camera. Use the Browser feature to view the captured footage.
You are now up and running!
6. What next?
Once you have the basics in place and your video surveillance system is up and running, there are some additional features which most users will want to explore (though it is beyond the scope of this tutorial to describe them in detail):
- Have SecuritySpy send you emails with attached images whenever motion is detected.
- Use SecuritySpy’s web server feature to view live video and captured footage from another Mac.
- Configure your router for remote viewing of your video surveillance system over the internet.
Pretty nice piece of software….I have an 8 channel DVR but I am only able to get one camera to appear on SecuritySpy. How do I get the other 7 cameras to appear?
Hi Carl, you will have to create a new network video device for each camera you want to add. If you are using one of SecuritySpy’s built-in device profiles, select a different “Input number” setting for each device. If you are using manual setup, the device will have some way of modifying the RTSP request to reference the different cameras (usually something like adding “&channel=2” to the request or something similar).
See Amazon review below. Will Samsung SNH-P6410BN still work with SecuritySpy?
No longer supports webpage access. Latest firmware Breaks IP camera functionality without warning., November 23, 2015
Latest firmware removed the ability for web address access to the camera. What this means is you can no longer type the IP address of the camera and be prompted for username/password. This makes it impossible to use your server to stream/record video. So if you are a synology server user and hope to record video you will no longer be able to.
Prior to firmware 1.07 you were able to use with synology server for unified streaming across multiple cameras, recording to server hard drive and local access to make changes. Unfortunately I purchased multiple cameras prior to the firmware update and no stuck with cameras that don’t work for my application.
Thanks for the information, the firmware update hobbles the camera and severely reduces its usefulness. We’ve had reports of users still making it work with SecuritySpy, but the lack of web server access make it very difficult to set up and use with third party software such as SecuritySpy. We’ve added a note in the above blog post to highlight this information, with a few alternative camera models that have similar features.
I’m planning on purchasing a Sumpple S610 outdoor video camera. It’s supposedly ONVIF compliant. Anyone have this setup or know if it will work with SecuritySpy? Thanks.
We haven’t come across this particular camera before, so can’t say for sure whether it will work, but SecuritySpy does support ONVIF cameras so if this one is compliant then you shouldn’t have any problems. However, to avoid any potential issues, I would advise you to stick to cameras already on our list of supported cameras.
To use on a mobile device, iPhone or iPad, I’d have to open the IP’s port Security Spy is running on? I can’t find a app to use.
Please see our Remote Monitoring instructions. If you have problems please email us and we’ll do our best to help you get up and running.
Is this software compatible with D-link IP Cameras? I bought 8 D-link cameras (4 x DCS-934L, 4x DCS-5009L Pan Tilt) thinking it would be an easy setup with my Mac Mini, but the mydlink UI makes it incredibly difficult to setup and use the way I wished. I don’t need remote access. I would like to be able to view, control and record (audio/video) all 8 cameras on local network with the Mac Mini and also have viewing capabilities on iPad, iPhone, and other Mac computers on network if possible. After initial setup the network would have limited or no internet access. You’re software seems like a perfect match but worried about camera compatibility. Thanks for any info.
D-Link cameras aren’t always the easiest to set up, but they all are compatible with SecuritySpy once you get the setup right. Firstly, to get the cameras set up on your network, follow our instructions entitled Cameras with a DHCP address by default in the section Connecting to a Camera Over Ethernet in our SecuritySpy Installation Manual.
Then, use the addresses you assigned to set up the cameras in SecuritySpy, under Preferences -> Cameras. For the Profile setting, try each D-Link profile in turn – at least one should work.
If you have any further problems, please email us and we’ll help.
Will this work on foscam ip cameras?
Yes, SecuritySpy works with Foscam cameras, however we don’t officially support many models as they tend not to be very reliable – please see our list of supported cameras here: http://bensoftware.com/securityspy/helpcameralist.html
Some additional questions: The set up describes one Mac with a router/ switch for ethernet cable connections for a home setup. I already have a LAN with an unmanaged gigabit switch and ethernet cables.
1. Can Security Spy software be housed on a NAS and that be where the storage is for the video, too? I have more than one Mac on my LAN and would like to be able view the video from different rooms where there is a Mac.
2. If the above NAS concept is workable, would both Macs be able to run the software at the same time and see the same information?
3. If the above NAS concept is workable, would I need to buy one licensed copy of the software for each Mac? I store my Quicken datafile on the NAS so I can access the info from different rooms with Macs. I can’t have two computers accessing the same data at the same time. Therefore, I only need one license. If two or more computers can access the same video data (live or recorded) then I understand the need for multiple license of Security Spy software.
4. If Security Spy software can only be on one Mac in my LAN, can the video storage be in an external Thunderbolt SATA Drive attached to that one Mac?
Thank you for your time!
Hi Brad,
The usual setup is for SecuritySpy to run on one single Mac. It can store its recordings to the Mac’s hard drive, a network drive (NAS), or an external USB/Thunderbolt drive as you choose. When using a NAS, make sure to enable AFP (Apple File Protocol) on the NAS, and mount it on the Mac – it then looks like any other drive and can be set as the capture destination in SecuritySpy.
If you need to view live video or recordings on any other Mac on your network, the usual way to do this is via SecuritySpy’s web interface, using a web browser such as Chrome or Safari.
Let me know if you have any further questions.
Hi,
I’m looking at getting a single ONVIF compatible camera via Amazon. For a basic security viewing of our vehicles which are on the street.
I only have a MacBook Pro and take it away when working so, with your software does the Mac have to be hardwired all time time directly to the camera or recorder?
I want to be able to view remotely and have a video recording if required. I travel for work, so should damage occur when I’m not home, sometimes for over a month, how would I save a video when away?
Hi Scott, SecuritySpy needs to be running on a Mac in order to work, so if you need 24/7 CCTV coverage then you will need a Mac to run SecuritySpy continuously. An ideal Mac for this is a Mac mini, and for a single camera this doesn’t have to be very powerful (e.g. the basic current model, or an older used model would be sufficient).